In The Shop
Share
Sun Tach Rebuild
")
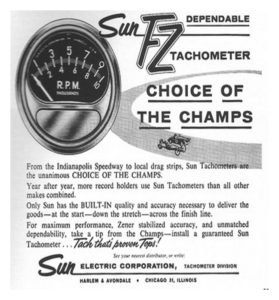
It’s no secret that the legendary Sun tachometer was an absolute requirement for any muscle car owner ( or wannabe muscle car owner) in the 50’s, 60’s, 70’s and beyond. It was impossible to avoid ads for Sun tachometers in virtually every automobile related publication. Hyped as the #1 choice of professional racers, every fan of going fast, with style, had one. Most often they were either mounted- on the dash, or in ‘stealth mode’ on the steering column. Sun tachometers were affordable and functional, not to mention great looking with a distinctive chrome housing. It’s no surprise that, over half a century later, vintage Sun tachometers are still in demand by those whose expectations demand the authenticity of an original Sun tachometer.
Although Sun, now called Sunpro, sells a ‘retro’ line of tachometers, if your dream car just has to have the genuine article, you’re got your work cut out for you. You will spend lots of time scouring craigslist ads and eBay listings to find that perfect original two piece Sun tach, just like the one you had years ago. But here’s the rub, vintage RC models frequently command prices of $200, $300, or more for complete units, and even these typically need to be serviced, repaired, or completely restored to insure that they are functioning properly. And if you are one of those that discovers that the ‘steal of a deal’ you thought you got resulted in only half of a two piece kit, what do you do then?
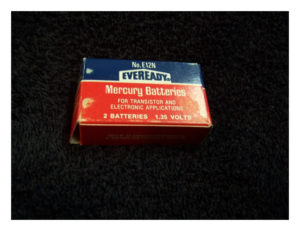
You could jump back in and start looking for the original sender, an ancient piece of electronics by today’s standards, which uses an equally ancient mercury style battery. And you might even find one, that works, at a reasonable price, but don’t count on it. More likely than not you will get a box, with a corroded circuit board, due to acid leakage from those 50+ year old batteries. Suddenly that ‘steal of a deal’ is not looking so great after all.
But there is hope, from a company that was actually in business before Sun ever built their first tachometer. For well over 80 years they have serviced, repaired, and restored almost every tachometer Sun has ever produced, including the original Sun military varieties that were built for jeeps and tanks. Located in Michigan, Bob’s Speedometer specializes in antique gauge restoration, and has a satisfied customer base that is truly worldwide. In fact, there are Bob’s Speedometer customers on every single continent on our planet, except Antarctica.
Bruce, the owner of Bob’s Speedometer, has agreed to give his customers an ‘inside look’ at just one of the ways to convert a vintage two piece RC-85 Sun tachometer into an easy-to-install, one piece tach, that takes only two wires to hook up. So.. let’s head on over to Bob’s and take a peek-
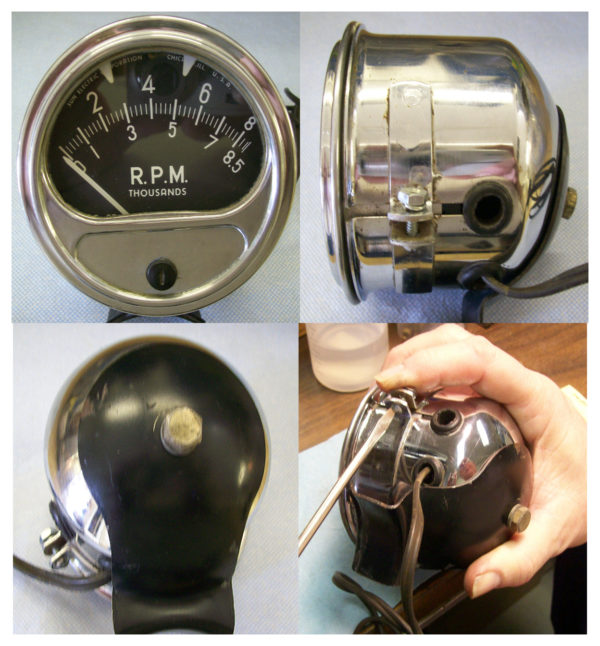
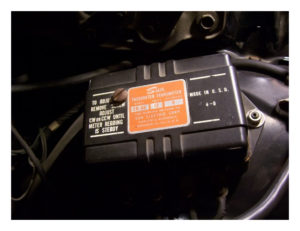
Here are some pictures showing an original Sun model RC-85 sent in by one of the Bob’s Speedometer customers. It was purchased on eBay, but did not include the required sending unit. Since the tach was in pretty good shape cosmetically, what Bruce suggested was a complete inspection, cleaning, and calibration. The customer also needed a replacement for the missing sending unit. In this particular case, the plan was to install a new circuit board inside the tach itself, since there was no sending unit housing to install it into. If there had been a housing, the customer could have opted to have the new circuit board installed there instead, preserving the authentic look of the original RC series units.
You can see the two grommets in the casing. One set is for the lighting hookups, the other is for the feed from the sending unit. The first part of the project, obviously, is to open the housing and get to the meter movement inside. That’s as simple as the following steps-
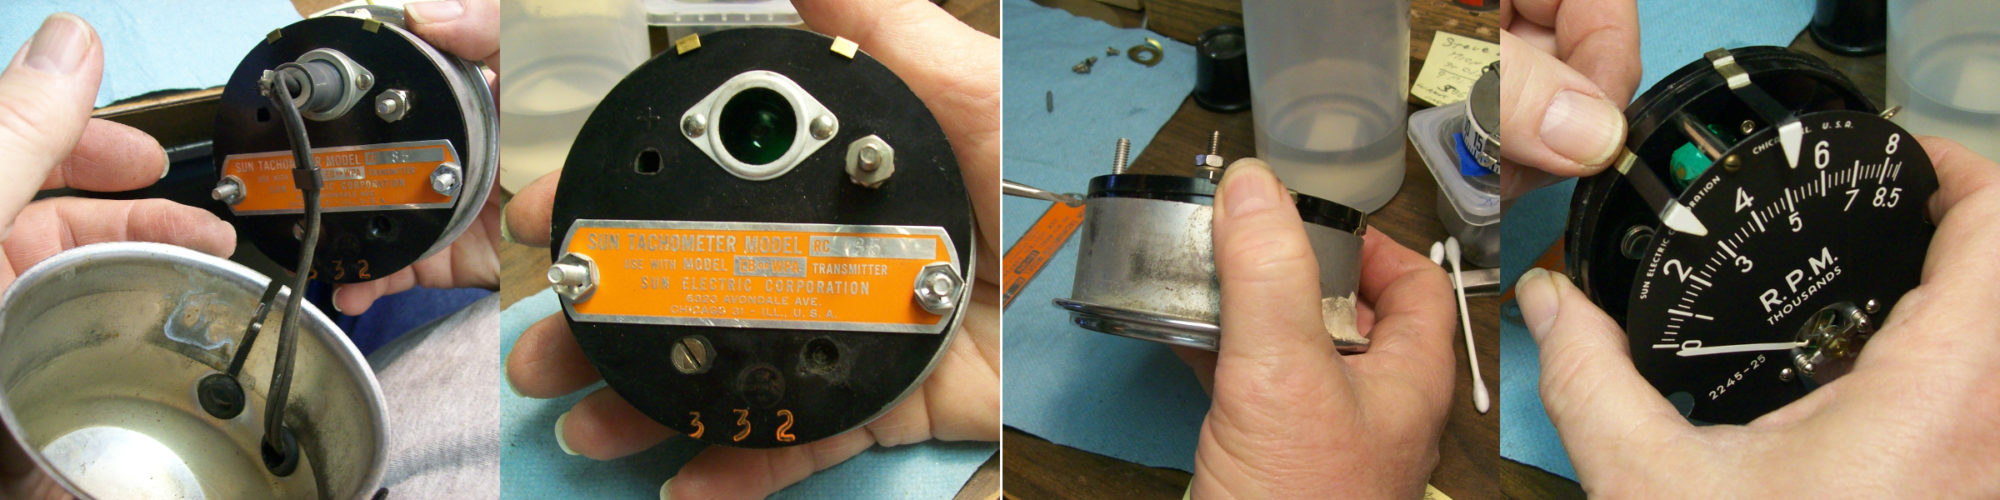
- Remove the screw that holds the clamp on housing assembly
- Pull out the internals
- Remove the nuts on the backplate
- Set aside the adjustable shift pointers
- Coax out the connection bolts from between the backplate and the face, and
- Separate the meter movement and face from the backplate.
Now that the meter movement can be gotten to, it’s time for the fun parts. First there is a physical inspection. Most folks would be amazed at how many hours can be spent each week at Bob’s on the painstaking process of picking tiny metal shavings, most of them much thinner than a human hair, out of the internal workings of meter movements. The movement is also inspected for any physical damage, and initial adjustments are made. Next comes a ‘power on’ test, using a digital multimeter, just to make sure the movement is functional. Once these preliminaries are completed, it’s time to balance the meter movement.
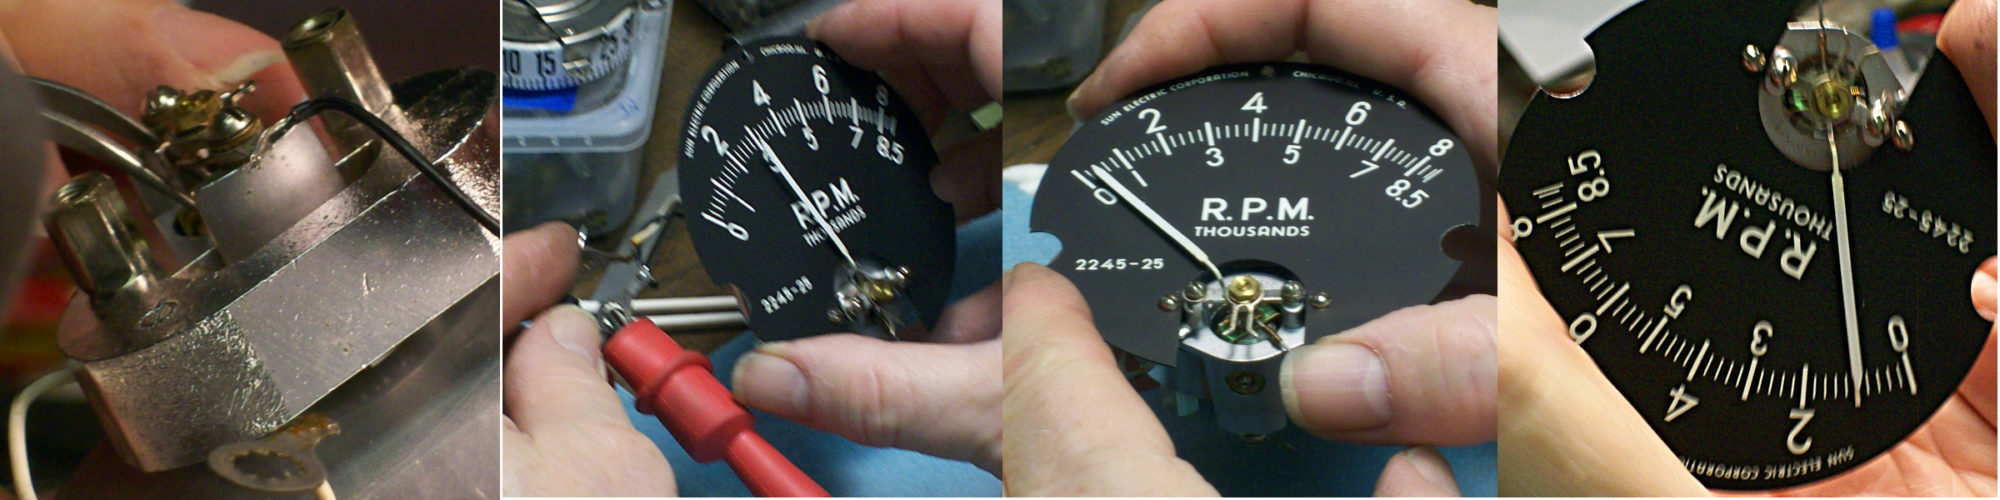
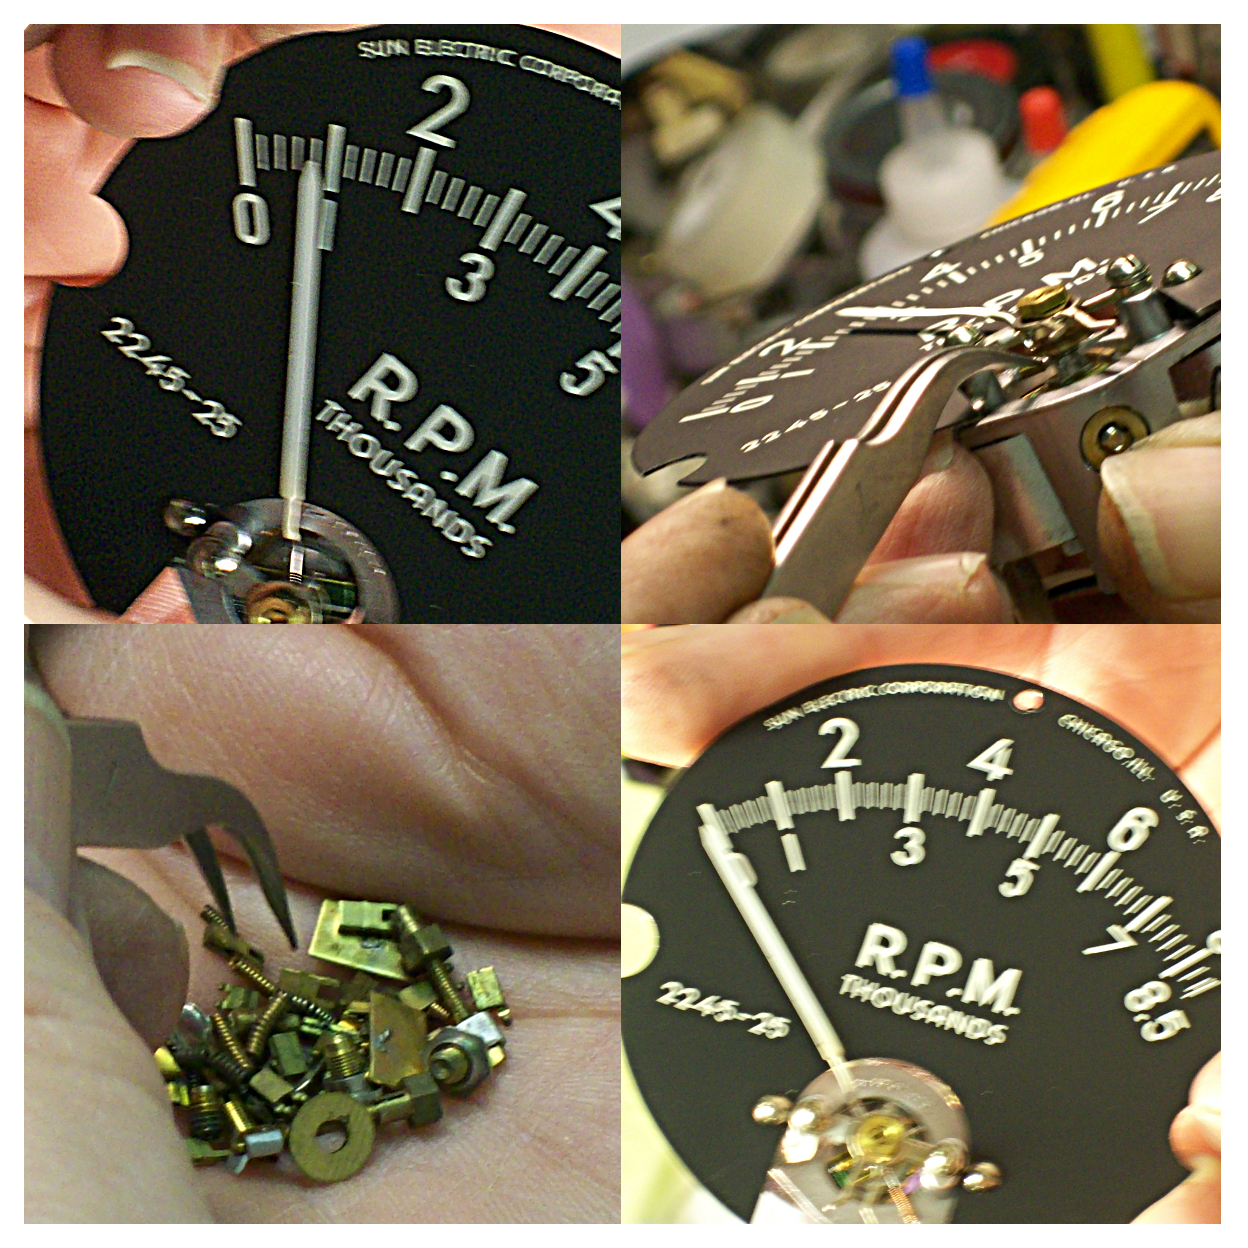 Balancing the meter movement is a multi-step process. First the meter is calibrated while held in a neutral position. The meter is then reoriented so that it is at 180 degrees relative to the lowest reading position. Any discrepancies in the position of the pointer are noted. The meter is then rotated again so that it is oriented at zero degrees relative to the lowest reading position. The object is to determine if the tiny weights that balance the pointer are ‘heavy’ on either one side or the other. Balancing the meter is done by adjusting the positioning of the tiny weights as needed. In some cases weights must be added or removed to get the desired results. A correctly balanced movement will show virtually no discrepancy in relative needle position when rotated from neutral, low, high, or any other position. The only thing left to do now is to install the new aircraft quality circuit board that will serve as a replacement for the original Sun control module. How this circuit board gets installed is one of the things that make this particular project so unique.
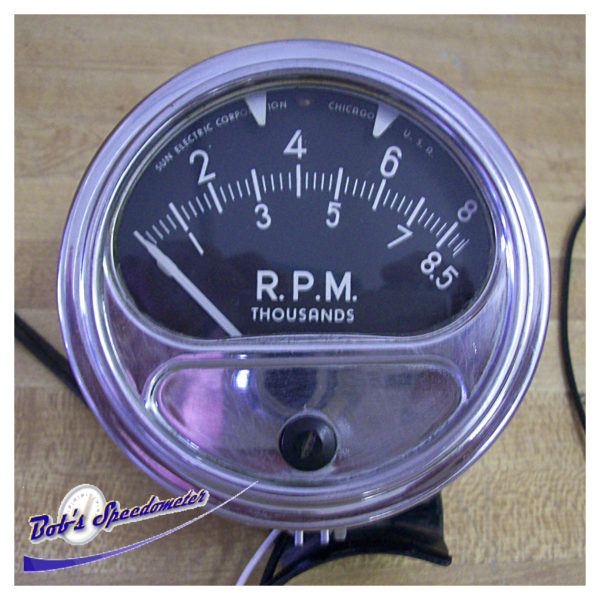
As you may recall, the customer was given the choice of having Bob’s Speedometer supply a generic control box to house the new circuit board controller, or to have it installed inside the tachometer housing instead. The customer opted for a one piece design. Let’s take a look at just how this was done-

First the new circuit board is checked and adjusted to a basic tolerance. Then it is connected to the tachometer meter, and goes through a series of calibrations, making sure that the meter reads correctly at the low, high, and mid ranges. Once the setup is calibrated, thin insulating material is added to the back of the tachometer face. When the insulator has set up, the new circuit board is fastened to the back of the face as well. The wires are routed so that they will not impede anything, and fastened down if needed. The tachometer gets another testing before being reassembled, and then another complete testing after it has been reassembled. At this point the tachometer’s connection wires are labeled for the customer’s convenience, and it is packaged and shipped back to the customer.
We hope you’ve enjoyed this pictorial review of how the folks at Bob’s Speedometer converted a legendary muscle car tachometer, giving it 21st century electronics, so that, once again, it is ready to give the “big dogs” a run for their money!
Muscle Car Legend Meets the 21st Century – David Jarrett for Bob’s Speedometer © 10/25/2012 All logos, trade names, trade marks, and photos of the same belong to their respective owners. The use of such material in this article falls under the Fair Use provisions of intellectual property laws.
